Starting with the square block main chassis, added 4 x 12mm bearings and 4 x 8mm bearings.
Above is the main square chassis, bearings and motor holder assembly.
Getting the bearings into the square was tough.. the holes were a little too tight
As you can see the chassis started to crack... I added some weld-on 16 to strengthen the cracks.
used the clamps to hold the assembly together while it dried
After dried - verified strength.... looks great
Next we take the motor holder and align the wider arm to the same side where its wider on the 8mm bearing side.
You will see that the wider leg matches to the wider side of the square.
Bolt down the assemblies using M5 70mm bolts.
Next we insert 2x m5 bolts ends facing inward through the 8mm bearings.
Next we need to add these motor sleeves to the 2 x 165rpm planetary motors.
They slip over the top of the drive and push down against the rim of the larger portion of the motor.
We insert the motor plus sleeve into the bottom holes.
Motor doesn't quite fit perfectly here...
This is out too far... will need to end up pushing the motor and sleeve in flush.
added the 2nd motor to its sleeve
Both motors are now installed they will need to be pushed in flush.
Now adding the 85rpm planetary motor to the last hole mount
This too will need to be pushed out more to align with the bottom motors once they are made flush.
Here is the other view of the motors.
A view of the assembly
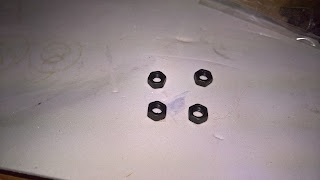
We need to insert these m5 nuts into respective slots to add bolts to tighten down the lower motor mounts to hold those motors in place.
Here
and here
Completed assembly
pushing the motors in flush as well as the upper motor.
Here is another view of the motors installed. These handle the axle drive itself while the upper motor is for the head tilt in front to back.


No comments:
Post a Comment